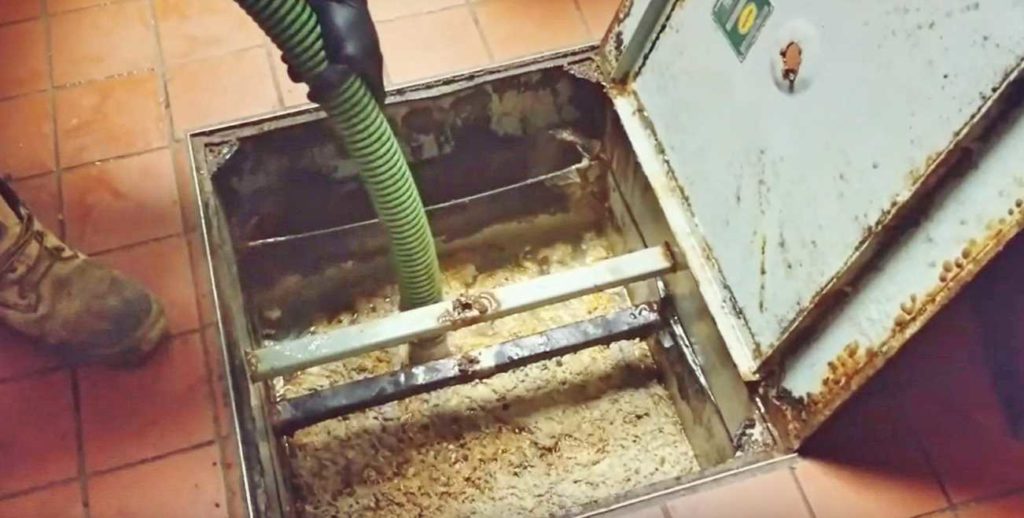
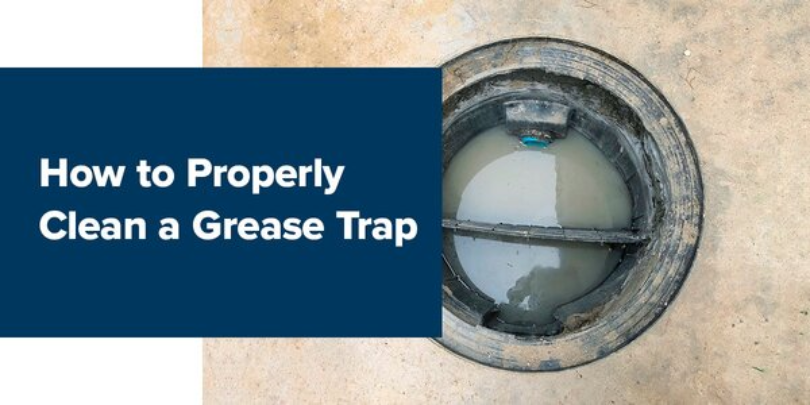
To clean a grease trap, remove the lid and scoop out the solid waste. Clean the interior with soap and warm water.
Grease traps are essential for preventing fats, oils, and grease from clogging plumbing systems. Regular maintenance ensures their efficiency and extends their lifespan. Cleaning a grease trap might seem daunting, but it is a straightforward process with the right approach.
Proper cleaning helps avoid unpleasant odors and potential blockages. Neglecting this task can lead to costly repairs and health hazards. Consistent upkeep keeps your kitchen running smoothly and hygienically. Whether in a commercial or residential setting, regular grease trap cleaning is crucial. This guide provides simple steps to keep your grease trap in optimal condition.

Credit: www.wikihow.com
Introduction To Grease Traps
Grease traps are essential for commercial kitchens. They prevent fats, oils, and greases from entering the sewage system. Proper maintenance is crucial to keep them functioning well. Understanding how they work helps maintain cleanliness and efficiency.
Importance Of Regular Cleaning
Regular cleaning of grease traps is vital for several reasons:
- Prevents Blockages: Regular cleaning stops blockages in the plumbing system.
- Reduces Odors: A clean grease trap reduces bad smells in the kitchen.
- Increases Efficiency: Clean traps work better and last longer.
- Health Compliance: Keeps the kitchen compliant with health regulations.
Cleaning schedules depend on usage. High-usage kitchens need more frequent cleaning.
Quote For Grease Trap Cleaning.
Under No Obligation !
Basic Functionality
Understanding the basic functionality of grease traps is key. Here’s how they work:
| Component | Function |
|---|---|
| Inlet | Allows wastewater to enter the trap. |
| Baffles | Slow down the flow, separating grease from water. |
| Grease Retention Area | Stores the trapped grease. |
| Outlet | Allows cleaned water to exit. |
The process is simple. Wastewater enters through the inlet. Baffles slow the flow, separating grease. The grease stays in the retention area. Clean water exits through the outlet.
Regular cleaning ensures each component works efficiently. Ignoring it can lead to costly repairs.
Identifying Your Grease Trap Type
Knowing your grease trap type is essential for proper maintenance. This guide will help you identify whether you have an indoor or outdoor grease trap. We will also discuss how to determine the size and capacity of your grease trap.
Indoor Vs. Outdoor
Indoor grease traps are usually found beneath sinks or in kitchen areas. They are smaller and are easier to access. These are common in restaurants and small commercial kitchens.
Outdoor grease traps are larger and are located outside the building. They are often buried underground. These are suitable for larger establishments with higher grease output.
Size And Capacity
The size and capacity of your grease trap are important for effective operation. Smaller traps fill up faster and need frequent cleaning. Larger traps can handle more grease but may require special equipment for cleaning.
Here is a simple table to help you understand the relationship between size and capacity:
| Grease Trap Size | Capacity (Gallons) | Cleaning Frequency |
|---|---|---|
| Small (Indoor) | 5-20 | Weekly |
| Medium (Outdoor) | 20-50 | Bi-weekly |
| Large (Outdoor) | 50-100 | Monthly |
Choose the right size and capacity based on your needs. This will ensure your grease trap works efficiently.
Preparation For Cleaning
Proper preparation is key to effectively cleaning a grease trap. This process involves gathering the right tools and ensuring safety. Let's dive into the essential steps to prepare for a successful cleaning session.
Gathering Necessary Tools
Before you begin, make sure you have the following tools:
- Rubber gloves: Protect your hands from grease and grime.
- Face mask: Prevent inhaling unpleasant odors.
- Protective goggles: Shield your eyes from splashes.
- Bucket: Collect the grease and debris.
- Scraper: Remove stubborn grease.
- Shop vacuum: Suck up the remaining sludge.
- Paper towels: Wipe down surfaces.
Safety Measures
Ensure you follow these safety measures:
- Wear protective gear: Gloves, goggles, and a mask.
- Ensure proper ventilation: Open windows or use a fan.
- Disconnect power sources: Turn off any electrical devices nearby.
- Keep a first aid kit: Be prepared for minor injuries.
- Have a spill kit ready: Quickly clean up any accidental spills.
Following these steps ensures a safe and efficient grease trap cleaning process. Proper preparation minimizes risks and enhances the effectiveness of your efforts.

Credit: replaceyourgarbagedisposal.com
Step-by-step Cleaning Guide
Cleaning a grease trap is essential for maintaining your kitchen's hygiene. Follow this simple step-by-step guide to ensure your grease trap is spotless. A clean grease trap prevents clogs and unpleasant odors.
Removing The Lid
First, use a wrench to remove the grease trap lid. Be cautious as it might be heavy. Place it aside on a flat surface.
Extracting Grease And Solids
Next, use a scoop to extract all grease and solids. Place them in a container for proper disposal. This ensures the trap functions effectively.
Scraping The Sides
After removing the grease, use a scraper to clean the sides of the trap. Scrape off any stuck residues to keep the trap spotless.
Flushing With Water
Finally, use a hose to flush the trap with water. This removes any remaining particles. Ensure the water flows smoothly through the trap.
| Step | Action |
|---|---|
| 1 | Remove the lid |
| 2 | Extract grease and solids |
| 3 | Scrape the sides |
| 4 | Flush with water |
By following these steps, your grease trap will remain clean and functional. Regular cleaning helps maintain a healthy kitchen environment.
Disposal Of Grease Waste
Disposing of grease waste is a critical part of maintaining a grease trap. Proper disposal helps keep our environment safe and complies with local laws. Below are key considerations and regulations for disposing of grease waste.
Environmental Considerations
Grease waste can harm the environment if not handled correctly. It can clog waterways and harm wildlife. To prevent this, follow these environmental guidelines:
- Never pour grease down the sink or toilet.
- Use a designated grease disposal container.
- Recycle grease waste whenever possible.
Local Disposal Regulations
Each area has its own rules for disposing of grease waste. It's important to know and follow your local regulations. Here are common regulations you might encounter:
| Regulation | Description |
|---|---|
| Separation | Keep grease waste separate from other trash. |
| Special Containers | Use approved containers for grease disposal. |
| Licensed Haulers | Only use licensed waste haulers for disposal. |
Check with your local waste management authority for specific rules. Following these regulations ensures safe and legal grease waste disposal.
Cleaning Frequency And Maintenance Tips
Keeping your grease trap clean is essential for a smooth kitchen operation. Regular cleaning prevents blockages and foul odors. Below, we will discuss cleaning frequency and offer some maintenance tips to keep your grease trap in top condition.
Determining Your Schedule
How often you clean your grease trap depends on your usage. Heavy use means more frequent cleanings. Follow these steps to set your schedule:
- Check the trap weekly to gauge grease buildup.
- If the trap is one-quarter full, it’s time to clean.
- Establish a routine based on your findings.
A typical cleaning schedule might look like this:
| Usage Level | Cleaning Frequency |
|---|---|
| High | Weekly |
| Moderate | Bi-weekly |
| Low | Monthly |
Regular Upkeep Practices
Consistent maintenance ensures your grease trap works effectively. Follow these tips:
- Use a strainer to catch food particles before they enter the trap.
- Avoid pouring oils and fats directly down the drain.
- Scrape plates and pans to remove grease before washing.
- Inspect the trap lid and gasket for wear and tear.
- Hire a professional for a thorough cleaning twice a year.
By following these regular upkeep practices, you can extend the life of your grease trap. This also helps maintain a clean and efficient kitchen environment.
Troubleshooting Common Issues
Cleaning a grease trap can present various challenges. Knowing how to troubleshoot these issues helps maintain a clean and efficient system. Below are some common problems and how to solve them.
Odors
One common issue is unpleasant odors. These smells can indicate a problem in the grease trap. Follow these steps to address odors:
- Ensure the grease trap is cleaned regularly.
- Check for any food particles or debris stuck inside.
- Use a grease trap deodorizer to neutralize smells.
- Inspect the trap for any cracks or leaks.
Backups And Overflows
Backups and overflows can cause significant disruptions. This often happens when the grease trap is too full. To prevent and solve this issue:
- Regularly schedule cleaning sessions for the grease trap.
- Check the trap's capacity and empty it before it reaches full.
- Inspect the inlet and outlet pipes for any blockages.
- Consider installing a larger grease trap if the current one is too small.
By addressing these common issues, you can keep your grease trap in top condition. Regular maintenance and timely troubleshooting will ensure a smooth-running system.

Credit: www.mrrooter.com
Professional Vs. Diy Cleaning
Cleaning a grease trap is essential for maintaining a healthy kitchen. Deciding between professional and DIY cleaning can be challenging. Each option has its benefits and limitations. This section will help you make an informed choice.
When To Hire A Professional
Professional cleaning services are ideal for large or complex grease traps. They have specialized tools and expertise. Consider hiring a professional if:
- Your grease trap is too large.
- You lack the necessary tools.
- You want to ensure thorough cleaning.
- You have a busy schedule.
Professionals can also identify potential issues. They can perform routine maintenance and repairs. This helps in preventing future problems.
Advantages Of Diy Cleaning
DIY cleaning can be cost-effective and convenient. Here are some advantages of cleaning your grease trap yourself:
- Cost Savings: Avoid paying for professional services.
- Flexibility: Clean your grease trap at your convenience.
- Learning Experience: Gain knowledge and skills in grease trap maintenance.
- Control: You know exactly what is being done.
To clean a grease trap yourself, follow these steps:
| Step | Action |
|---|---|
| 1 | Turn off water and remove the grease trap lid. |
| 2 | Use a scoop to remove grease and solid waste. |
| 3 | Scrub the interior with a brush and warm, soapy water. |
| 4 | Rinse thoroughly and reassemble the grease trap. |
DIY cleaning requires regular attention. Ensure you have the proper tools and protective gear. Follow safety guidelines to avoid accidents.
Frequently Asked Questions
What Will Dissolve Grease In A Grease Trap?
Baking soda and hot water can dissolve grease in a grease trap. Enzyme-based cleaners also work effectively. Regular maintenance is crucial.
How To Clean A Grease Trap Yourself?
To clean a grease trap yourself, first remove the lid. Scoop out solid waste with a shovel. Scrape down the sides and lid. Rinse the trap with water. Dispose of waste properly.
How Do You Clean A Blocked Grease Trap?
To clean a blocked grease trap, first remove the lid. Scoop out solid waste and dispose of it properly. Scrape the trap's sides and bottom. Rinse with water to remove remaining grease. Reassemble the trap. Regular cleaning helps prevent blockages.
How Often Does A Grease Trap Need To Be Cleaned?
A grease trap should be cleaned every 1-3 months. Frequency depends on usage and local regulations. Regular cleaning prevents clogs and odors.
Conclusion
Regularly cleaning your grease trap ensures optimal performance and prevents costly plumbing issues. Follow our simple steps to maintain a clean, efficient system. Proper maintenance extends the life of your grease trap and keeps your kitchen running smoothly. Stay proactive and keep your establishment compliant with local health regulations.
Happy cleaning!